Yes, the old ”WhatsApp settings page” is now known as ”Chat flow settings”. Some changes are made for your more convenience of usage of the app, and there are three tabs are added on the same page which will make your tasks more accessible, such as :
- Configurations
- Chat flow settings
- Templates
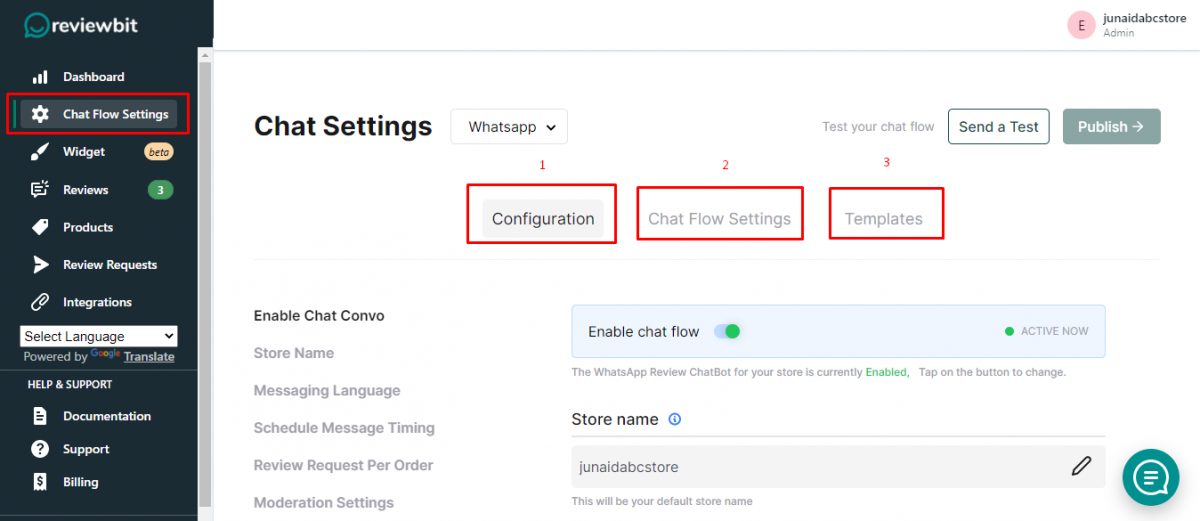
Configuration tab
- As the first step, you should “Enable chat convo” as usual

2. In the next step, you can set your “Store name”.

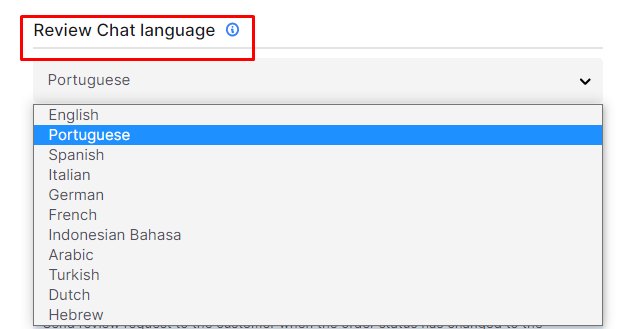
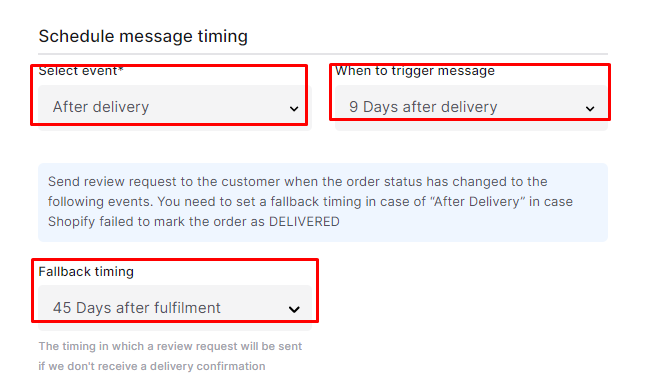
4. Then you have to set up “Schedule message timing”
Here you have to select the event, which means when the request should be sent, after purchase/fulfillment/delivery, and when to trigger the request, that is the number of days after purchase/fulfillment/delivery and set a fallback timing, if we do not receive a delivery confirmation, we will send a review request at this time.
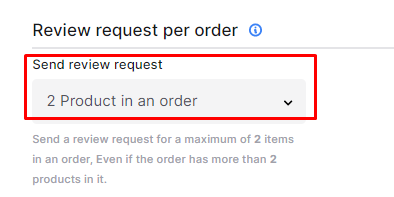
5. Set “Request per order”
Send a review request for no more than two items in an order, even if the order contains more than two products.
6. Set up “Moderation settings”
Here you can enable “auto-approving” of reviews and photo/video reviews for those above a particular rating that you can set there itself. There is also included an enabling option for “auto-publishing“. So, you don’t need to publish reviews manually.
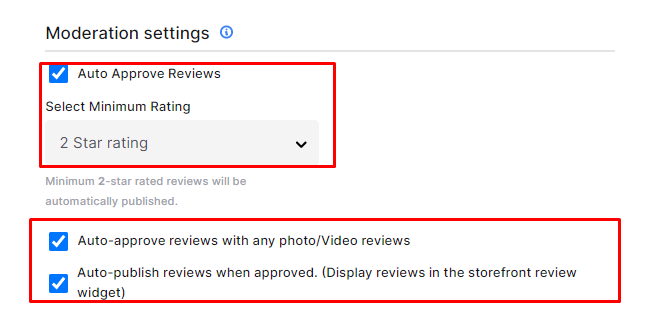
7. Set up “Support for low rating”
Here you can give your WhatsApp number if you received a low rating.

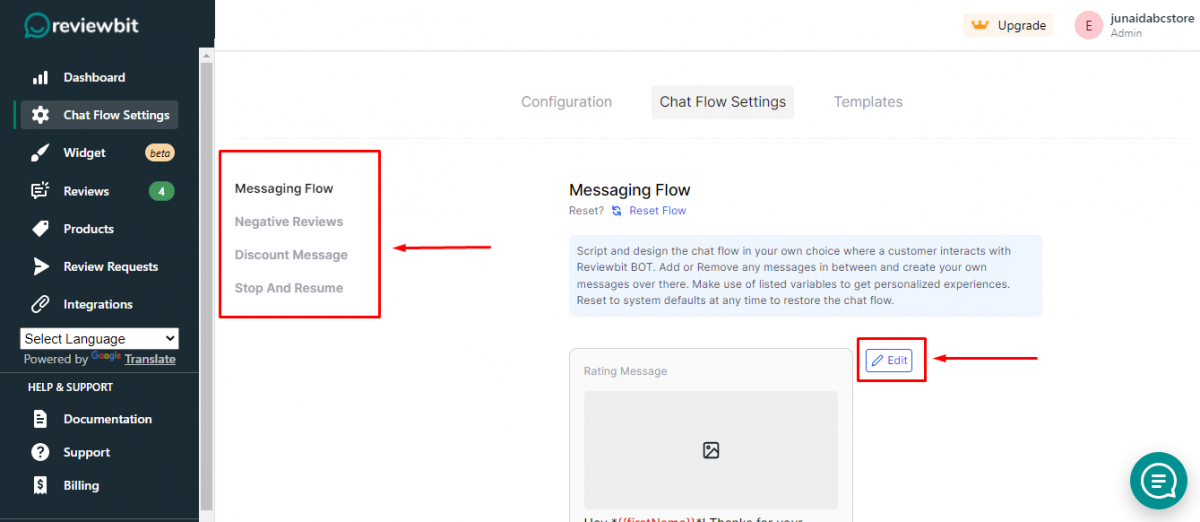
Chat flow settings tab
Here you can see how your chat flow is going on and also be able to edit each message here itself.
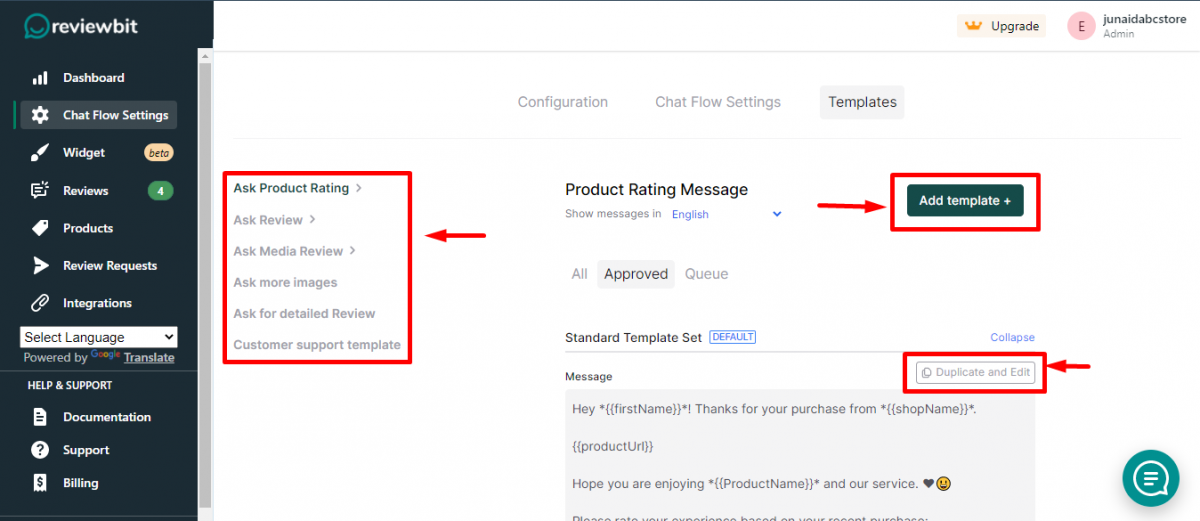
Templates tab
Here you can have a collection of all message templates by clicking “add templates” you can add different templates other than the existing ones and also edit them. Some of them required approval from WhatsApp. So, after approval, you will have that particular message on your chat flow.
- After making all changes click the “Publish” button

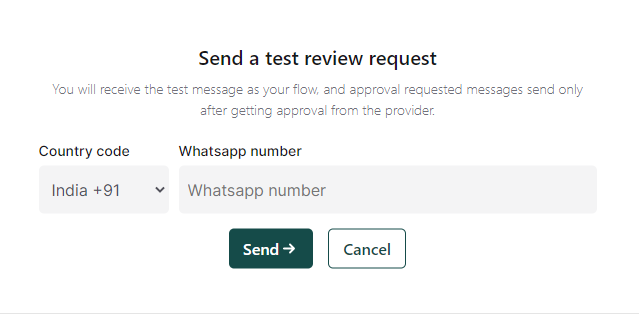
- Then click “Send a test“to check whether all are working well. Then a pop-up appears; there, you can give your WhatsApp number to which test templates need to be sent and click “Send” button.


Leave A Comment?